If you love the sweet, crunchy magic of Butterfinger candy bars, these Butterfinger Balls will become your next dessert obsession. They’re creamy, crunchy, chocolatey, and perfectly bite-sized — the kind of treat that makes you feel like a kid again.
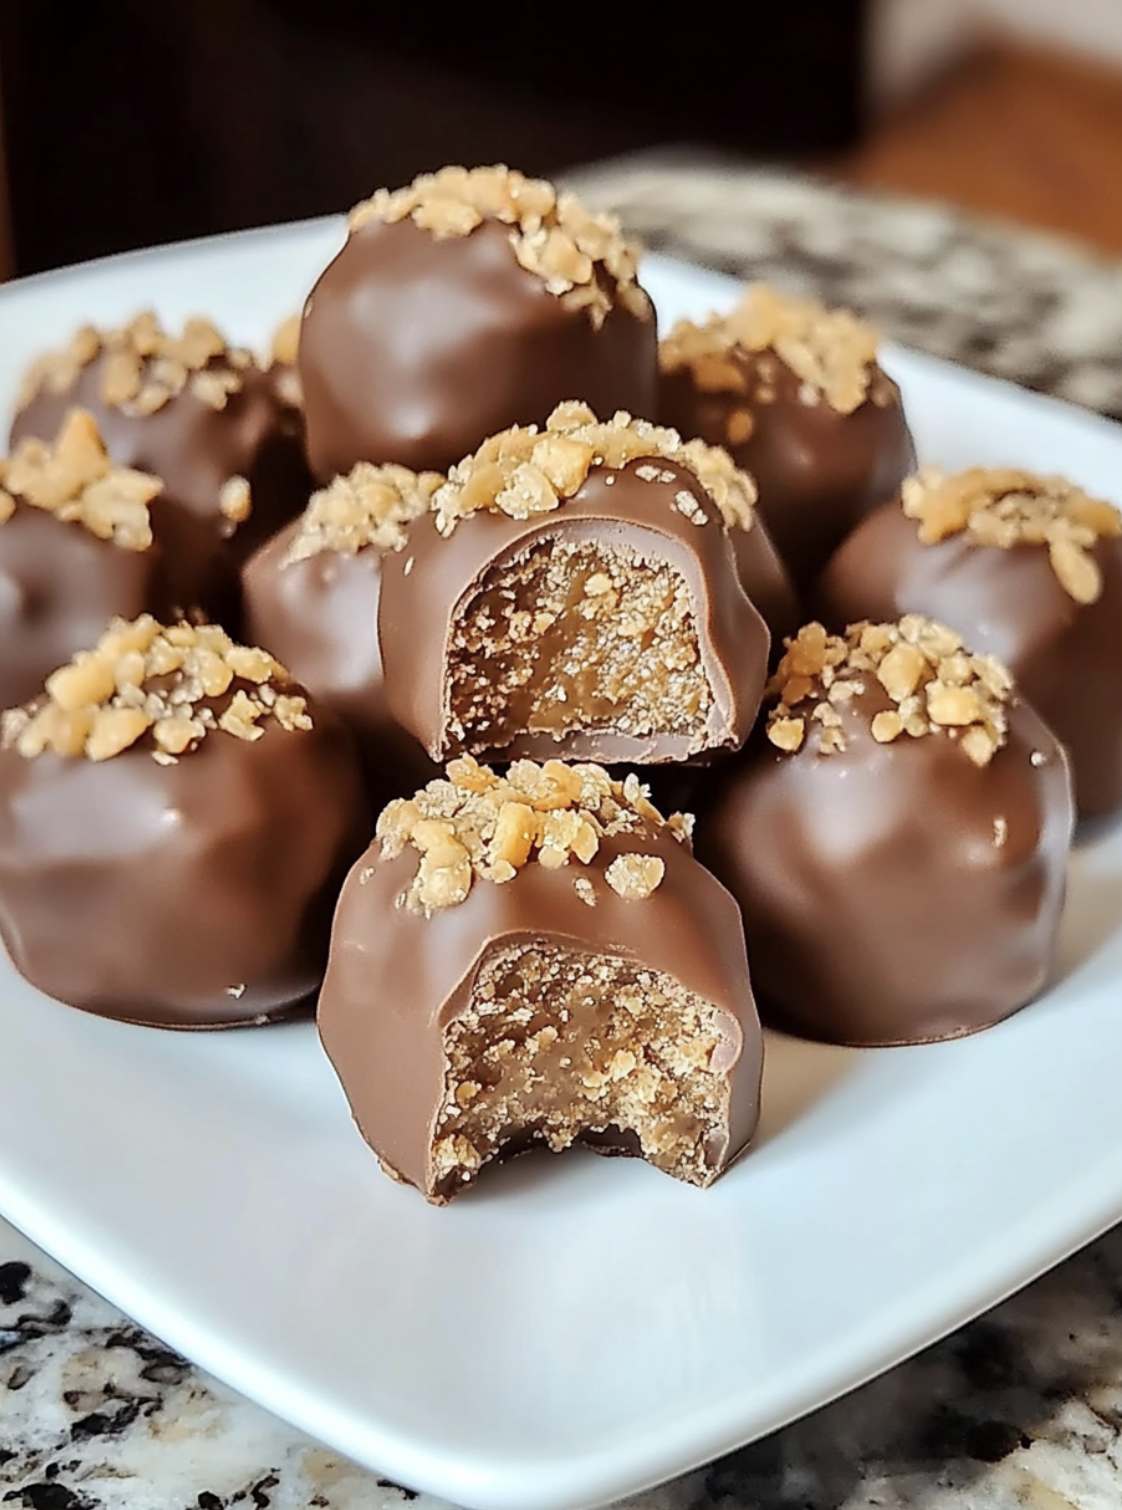
Each ball combines smooth peanut butter, buttery crumbs of crushed Butterfinger candy, and powdered sugar for sweetness, all rolled together and dipped in rich, melted chocolate. The result is a decadent candy bite that melts in your mouth with just the right balance of salt, crunch, and creaminess.
What makes this recipe even better is its simplicity. There’s no baking, no fancy equipment, and no complicated steps — just mix, roll, dip, and chill. These little bites are perfect for holidays, parties, or whenever you crave something sweet and nostalgic. They also make delightful edible gifts wrapped in a festive box or bag.
Why You’ll Love These Butterfinger Balls
You’ll love this recipe because it’s quick, easy, and irresistibly delicious. It transforms a few pantry staples into candy-shop-worthy truffles that take minimal time to make and zero baking skills to pull off.
Additionally, these bites have the perfect flavor balance. The nutty richness of peanut butter pairs beautifully with the crisp, toffee-like crunch of Butterfinger pieces. Meanwhile, the chocolate coating ties everything together for that classic candy bar taste in a fun, portable shape.
Furthermore, this is an excellent make-ahead dessert. You can prepare the filling in advance, chill it, and dip the balls whenever you’re ready. They store beautifully and taste even better after a day in the fridge as the flavors meld together.
Why You Should Try This Recipe
If you’re looking for a no-bake dessert that everyone will rave about, Butterfinger Balls are a guaranteed crowd-pleaser. They’re rich but not heavy, sweet but perfectly balanced, and endlessly customizable.
Moreover, this recipe is ideal for busy bakers. You can make dozens of candies in under an hour, and cleanup is a breeze. As a result, it’s a go-to for Christmas cookie trays, bake sales, or any celebration that calls for bite-sized indulgence.
They also freeze wonderfully, meaning you can make them ahead for holidays or special occasions. Simply thaw before serving, and they’ll taste freshly made.
Ingredients You’ll Need
For the Butterfinger Filling
- 1 (8 oz) block cream cheese, softened
- ½ cup creamy peanut butter
- 1 teaspoon vanilla extract
- 1 ½ cups powdered sugar
- 1 ½ cups crushed Butterfinger candy bars (about 6–7 full-size bars)
For the Chocolate Coating
- 2 cups semi-sweet chocolate chips (or milk chocolate)
- 1 tablespoon coconut oil or shortening (for smooth melting)
Optional Garnishes
- Crushed Butterfinger crumbs for topping
- Drizzle of white chocolate
- Sea salt flakes
How to Make Butterfinger Balls (Step-by-Step)
1. Prepare the Butterfinger Filling
Start by placing the softened cream cheese and peanut butter in a large mixing bowl. Beat them together until smooth and creamy. Next, mix in vanilla extract and powdered sugar gradually until a thick dough forms.
Once combined, fold in the crushed Butterfinger pieces until evenly distributed. The texture should be thick, slightly sticky, and full of crunchy bits.
2. Shape the Balls
Scoop out about one tablespoon of the mixture and roll it between your palms to form smooth balls. Place them on a parchment-lined baking sheet. Repeat until all the mixture is used.
3. Chill Until Firm
Transfer the tray to the refrigerator for at least 30 minutes (or the freezer for 15 minutes). This helps the balls hold their shape when dipping into warm chocolate.
4. Melt the Chocolate
In a microwave-safe bowl, melt the chocolate chips with coconut oil in 20-second intervals, stirring between each until smooth and glossy. Alternatively, use a double boiler for controlled melting.
5. Dip and Coat
Using a fork or dipping tool, submerge each chilled Butterfinger ball into the melted chocolate, ensuring it’s completely covered. Gently tap off the excess chocolate before placing it back on the lined tray.
6. Add Toppings (Optional)
Before the chocolate sets, sprinkle each ball with extra crushed Butterfinger or drizzle white chocolate over the top for a pretty finish.
7. Chill and Serve
Refrigerate the tray for 20–30 minutes until the coating hardens. Serve chilled or at room temperature and enjoy that perfect balance of creamy peanut butter, buttery crunch, and smooth chocolate.
Tips for the Best Butterfinger Balls
- Use room-temperature cream cheese — it blends smoothly without lumps.
- Crush the Butterfingers finely for even distribution in the filling.
- Chill the dough before rolling if it feels too soft.
- Line your tray with parchment paper to prevent sticking.
- Avoid overmixing once you add candy — it keeps the filling crunchy.
- Work in batches when dipping to keep the filling cold and firm.
- Use good-quality chocolate for a smooth, professional finish.
- Add a touch of salt to balance sweetness if desired.
- Drizzle with melted white chocolate for a festive presentation.
- Store chilled to maintain texture and freshness.
Variations & Substitutions
- Crunchy Peanut Butter Version: Swap creamy peanut butter for crunchy.
- Nut-Free Option: Use sunflower seed butter instead of peanut butter.
- Chocolate Lovers’ Twist: Mix mini chocolate chips into the filling.
- Oreo Butterfinger Balls: Add crushed Oreos for a cookies-and-cream flavor.
- Holiday Edition: Add red and green sprinkles for Christmas treats.
- White Chocolate Coating: Dip in white chocolate for a softer flavor.
- Dark Chocolate Lovers: Use bittersweet chocolate for richer contrast.
- Caramel Infusion: Add a spoonful of caramel sauce to the filling.
- Bourbon Kick: Stir in 1 teaspoon of bourbon for an adult-friendly version.
- Mini Butterfinger Bites: Roll smaller for dessert platters or gifting.
What to Serve With Butterfinger Balls
- Serve with coffee or hot cocoa for a cozy sweet treat.
- Pair with ice cream — chop them up as toppings for sundaes.
- Add to dessert boards with truffles and fudge for variety.
- Gift in boxes or jars with ribbons for holidays or birthdays.
- Serve chilled at parties for easy grab-and-go desserts.
Storage & Reheating Tips
To Store
Keep Butterfinger Balls in an airtight container in the refrigerator for up to 1 week. Separate layers with parchment paper to prevent sticking.
To Freeze
Place in freezer-safe bags or containers for up to 2 months. Thaw in the refrigerator overnight before serving.
To Serve
Serve chilled for a firm bite or at room temperature for a softer texture. Avoid microwaving — the chocolate coating can melt unevenly.
Recipe FAQs
1. Can I make Butterfinger Balls ahead of time?
Yes! These are perfect for making 1–2 days in advance. The flavor improves as they chill.
2. Can I use a different candy?
Absolutely. Try Reese’s, Snickers, or Crunch bars for fun twists.
3. Can I skip the cream cheese?
You can, but cream cheese adds richness and helps bind the filling.
4. Can I use white chocolate instead of dark?
Yes, though the flavor will be sweeter and creamier.
5. Can I make them smaller?
Definitely. Use a mini scoop for bite-sized treats.
6. How do I crush Butterfingers easily?
Place them in a zip-top bag and crush with a rolling pin until fine.
7. Can I make them dairy-free?
Yes — use vegan cream cheese, dairy-free chocolate, and almond butter.
8. Can I add salt to the filling?
A pinch of salt enhances the peanut butter flavor beautifully.
9. Can I use a stand mixer?
Yes, it helps mix everything quickly and evenly.
10. How long do they stay fresh?
Up to one week refrigerated or two months frozen.