Double, double, toil, and trouble — it’s time to bake something magical!
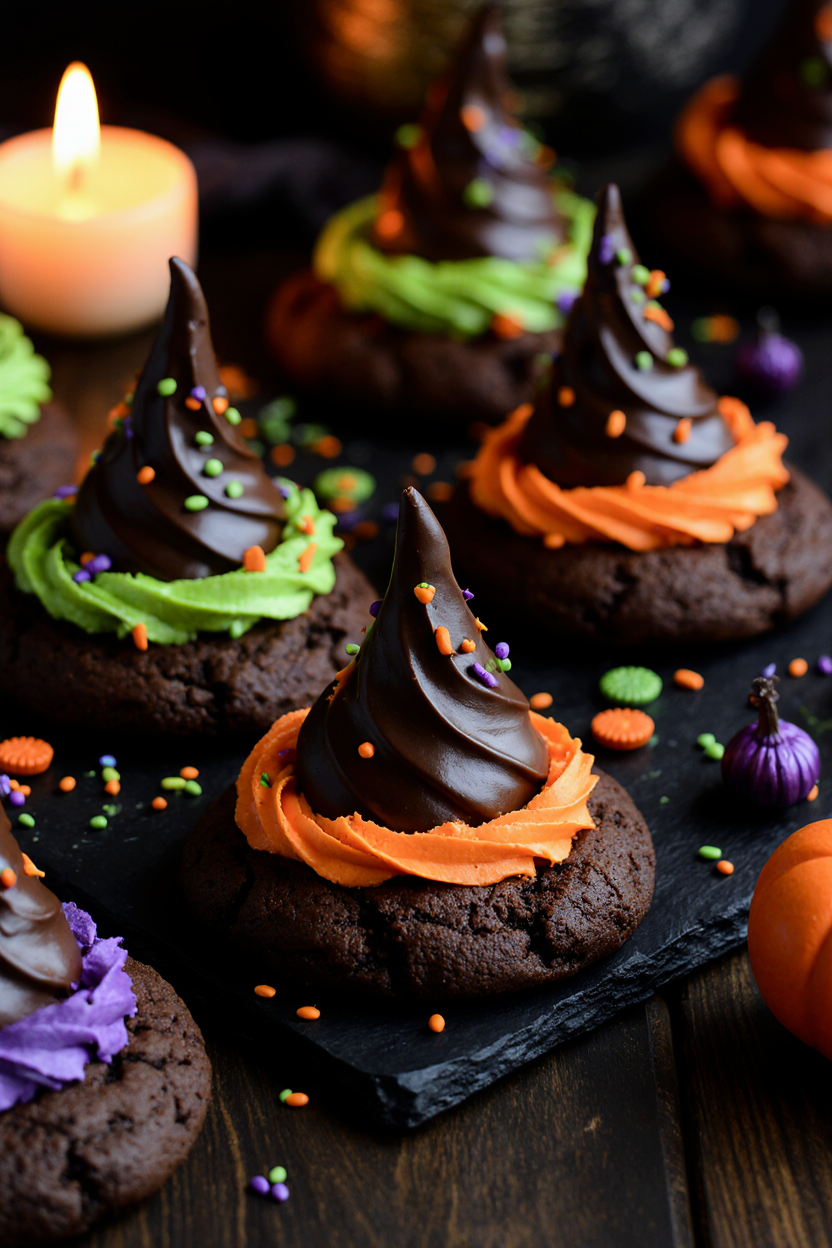
These Witch Hat Chocolate Cookies are a spellbinding addition to your Halloween dessert spread. Soft, fudgy chocolate cookies become the base for a candy “witch hat,” made with chocolate kisses and colorful frosting.
They’re charming, festive, and delicious — the perfect blend of whimsy and chocolate indulgence. Whether you’re baking for a Halloween party, a kids’ event, or just to add a little spooky flair to your week, these cookies will cast a delicious spell on everyone who tries them!
Why You’ll Love These Witch Hat Chocolate Cookies
- Easy to make — only a few ingredients!
- Adorable, festive, and perfect for Halloween.
- Soft, chewy chocolate base with a sweet candy kiss on top.
- Kid-friendly decorating activity.
- Perfect for party trays, bake sales, or spooky gifts.
Why You Should Try This Recipe
Halloween baking doesn’t have to be scary complicated! These cookies combine the comfort of a soft, chocolatey cookie with the charm of a fun, creative design. With their whimsical witch-hat look, they’re guaranteed to steal the show at any Halloween table.
Plus, they’re great for baking with kids — just bake the cookies, add the chocolate kiss “hat,” pipe on a frosting band, and decorate to your heart’s delight. They’re cute, crowd-pleasing, and practically melt-in-your-mouth good.
Ingredients You’ll Need
For the Cookies:
- 1 box devil’s food cake mix
- 2 large eggs
- ½ cup vegetable oil
- 1 teaspoon vanilla extract
For Decorating:
- 24 Hershey’s Kisses (unwrapped)
- ½ cup chocolate frosting (store-bought or homemade)
- Colored icing or gel frosting (orange, purple, or green)
- Halloween sprinkles (optional)
How to Make Witch Hat Chocolate Cookies (Step by Step)
Step 1: Prepare the dough
Preheat the oven to 350°F (175°C). In a mixing bowl, combine the cake mix, eggs, oil, and vanilla. Stir until smooth and thick.
Step 2: Scoop and bake
Scoop tablespoon-sized portions of dough onto a parchment-lined baking sheet. Flatten slightly with your fingers. Bake for 8–10 minutes, or until the edges are set but the centers remain soft.
Step 3: Add the witch hats
Remove the cookies from the oven and immediately press a chocolate kiss into the center of each one while still warm. Let cool completely.
Step 4: Add the hat bands
Once cooled, use colored icing or gel frosting to pipe a thin line around the base of the chocolate kiss, creating the witch hat “band.” Add Halloween sprinkles if desired.
Step 5: Let set and serve
Allow the frosting to firm up before transferring the cookies to a platter. Serve and watch the magic disappear — one bite at a time!
Tips for the Best Witch Hat Chocolate Cookies
- Don’t overbake – Keep the cookies soft for the best texture.
- Add the kisses while warm – They’ll adhere perfectly to the cookie surface.
- Chill the dough – Makes it easier to shape and prevents spreading.
- Use gel food coloring – For vibrant, bold frosting bands.
- Try different flavors – Chocolate fudge, vanilla, or red velvet cake mix all work.
- Pipe frosting carefully – Use a small round tip or plastic bag with a tiny cut.
- Get creative – Use edible glitter or shimmer for a magical touch.
- Cool completely – Prevent the frosting from melting.
- Use mini kisses – For smaller, bite-sized versions.
- Double the batch – They vanish fast at parties!
Variations & Substitutions
- Mint Chocolate Witch Hats: Use mint-flavored kisses for a cool twist.
- Peanut Butter Witches: Try chocolate-peanut butter kisses.
- Sugar Cookie Base: Use sugar cookie dough instead of chocolate for contrast.
- Colorful Hats: Dip kisses in colored candy melts for bright variations.
- Pumpkin Spice Magic: Add ½ teaspoon pumpkin pie spice to the dough.
- Gluten-Free Option: Use a gluten-free cake mix.
- Vegan Option: Substitute vegan cake mix and dairy-free chocolate kisses.
- Add Crunch: Sprinkle crushed Oreos or graham crumbs before baking.
- Monster Version: Add candy eyes for a fun twist.
- Frosted Tops: Drizzle melted chocolate over the finished hats.
What to Serve With Witch Hat Chocolate Cookies
- Halloween Punch 👻🥤 — for a sweet, fizzy pairing.
- Bat Brownies 🦇 — keep the spooky chocolate theme going.
- Blood Moon Fudge 🌙🩸 — for a rich, decadent addition.
- Pumpkin Spice Latte — cozy, seasonal perfection.
- Candy Corn Bark — adds color to your dessert table.
Storage & Reheating Tips
To Store:
Keep in an airtight container at room temperature for up to 5 days.
To Freeze:
Freeze baked (undecorated) cookies for up to 2 months. Thaw, then decorate before serving.
To Refresh:
Microwave for 5–7 seconds to make them warm and soft again before serving.
Recipe FAQs
Can I use homemade cookie dough?
Yes! Any chocolate cookie recipe will work beautifully.
Can I make these ahead of time?
Absolutely — bake the cookies and add decorations the next day.
Do the chocolate kisses melt?
They soften slightly but hold their shape perfectly.
Can I use candy melts instead of frosting?
Yes — they harden quickly and add a clean finish.
Can I make them gluten-free?
Yes, just use a gluten-free cake mix.
Can I make different hat colors?
Definitely! Try purple, orange, or neon green frosting bands.
Can kids help?
Yes — decorating is a fun and safe Halloween kitchen activity.
How do I make the frosting line neat?
Use a fine piping tip or snip a small hole in a ziplock bag.
Can I make them smaller?
Yes — just bake for 1–2 minutes less for mini witch hats.
Can I use other toppings?
Sure! Candy pearls, glitter, or edible stars look amazing.
These Witch Hat Chocolate Cookies are everything you want in a Halloween dessert — chocolatey, festive, and fun to make. Each bite brings soft cookie goodness and a hint of candy sweetness, wrapped up in a charming, witchy design that’s as delightful to look at as it is to eat.
They’re the kind of Halloween treat that brings smiles to both kids and adults, and they’ll add instant magic to your spooky dessert spread. Whip up a batch, grab your wand (or piping bag), and get ready to conjure up some edible Halloween enchantment!