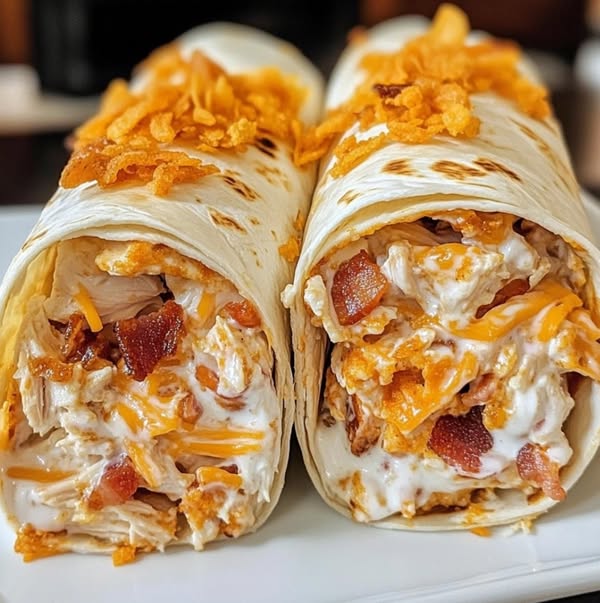
If you’re craving something bold, flavorful, and easy to make, these Crunchy Buffalo Chicken Bacon Ranch Wraps are about to become a regular in your meal rotation. They combine the tangy heat of buffalo sauce, the cool creaminess of ranch dressing, the smoky bite of bacon, the richness of cheddar cheese, and the satisfying crunch of crispy fried onions—all wrapped in a warm, golden tortilla. These wraps are quick to prepare, deliciously filling, and perfect for lunch, dinner, or a game day crowd-pleaser.
Ingredients
Before you get started, gather the following ingredients:
- 1 pound boneless, skinless chicken breast, cooked and shredded
- 1/2 cup buffalo sauce (use store-bought or homemade; Frank’s RedHot is a classic option)
- 1/2 cup ranch dressing
- 1/2 cup cooked bacon, crumbled (about 6–8 strips)
- 1 cup shredded cheddar cheese (sharp cheddar works best for flavor)
- 4 large flour tortillas (10-inch or burrito-size tortillas are ideal)
- 1 cup crushed crispy fried onions (such as French’s or a store-brand equivalent)
Instructions
Step 1: Prepare the Buffalo Chicken
Start by placing the cooked, shredded chicken in a large mixing bowl. Pour the buffalo sauce over the chicken and stir until all of the pieces are well coated. The chicken should be moist but not overly saturated.
Tip: If you’re short on time, you can use rotisserie chicken—just remove the skin and shred the meat before tossing it in buffalo sauce.
Step 2: Make the Bacon Ranch Mixture
In a small bowl, combine the ranch dressing and crumbled bacon. Mix until the bacon is evenly distributed throughout the dressing. This mixture adds a creamy, smoky element that complements the heat of the buffalo chicken.
Step 3: Assemble the Wraps
Lay out the flour tortillas on a clean, flat surface. Working with one at a time, place a generous portion of the buffalo chicken mixture in a horizontal line across the center of the tortilla, leaving about an inch of space from each edge.
Spoon some of the bacon ranch mixture over the buffalo chicken. Next, sprinkle a quarter-cup of shredded cheddar cheese over the top. Finish each wrap with a handful of crushed crispy fried onions for that signature crunch.
Step 4: Roll the Wraps
To roll each wrap, fold in the left and right sides of the tortilla, then roll from the bottom up, tucking in the fillings as you go. This method keeps everything neatly enclosed and prevents the contents from spilling out during cooking.
Step 5: Toast Until Golden and Crispy
Heat a large, nonstick skillet over medium heat. No oil is needed, as the wraps will brown nicely on their own. Once the skillet is hot, place the wraps seam-side down into the pan. Cook for 2 to 3 minutes on each side, pressing down gently with a spatula, until the tortillas are golden brown and slightly crispy on the outside.
Note: You may need to work in batches depending on the size of your skillet.
Serving Suggestions
Serve the wraps immediately while hot and crisp. For a complete meal, consider pairing them with:
- A side salad or coleslaw
- Celery and carrot sticks with extra ranch or blue cheese dressing
- Sweet potato fries or seasoned waffle fries
These wraps are hearty enough to stand on their own, but the added sides make for a more satisfying plate.
Recipe Notes
- Make it spicier: Use a spicier buffalo sauce or add a few dashes of hot sauce to the chicken mixture.
- Make it milder: Reduce the buffalo sauce to 1/4 cup and add 1/4 cup of melted butter for a gentler heat.
- Storage: These wraps are best enjoyed fresh, but leftovers can be refrigerated for up to 2 days. Reheat in a skillet or air fryer to restore crispiness.
- Variations: Try swapping the cheddar cheese for pepper jack, adding sliced avocado, or mixing in some chopped green onions for extra flavor.
Quick Facts
- Prep Time: 10 minutes
- Cook Time: 10 minutes
- Total Time: 20 minutes
- Servings: 4 wraps
- Skill Level: Easy
Preparation Tips
- Use Rotisserie Chicken for Convenience
Skip cooking raw chicken and use store-bought rotisserie chicken to save time. Just shred and toss with buffalo sauce. - Cook Chicken in Advance
Meal prep the shredded chicken a day or two ahead to cut down on cook time during busy nights. - Shred Chicken While Warm
Chicken shreds more easily when it’s still warm. Use two forks or a hand mixer for fast shredding. - Adjust the Heat Level
If you prefer milder wraps, use a mild buffalo sauce or mix buffalo sauce with melted butter. For extra heat, add hot sauce or crushed red pepper flakes. - Make It a Wrap Bar
Let everyone customize their own wrap by laying out the ingredients buffet-style.
Ingredient Tips
- Use Fresh, Soft Tortillas
Fresh flour tortillas roll more easily and crisp up better. If stiff, warm them for 10–15 seconds in the microwave to make them more pliable. - Swap for Low-Carb Tortillas
For a lighter version, use low-carb or whole wheat tortillas without sacrificing flavor. - Try Different Cheeses
Mix it up with pepper jack for spice, mozzarella for stretch, or a Mexican cheese blend for variety. - Use Real Bacon
For maximum flavor, cook fresh bacon until crispy and crumble it yourself instead of using bacon bits. - Add a Veggie Crunch
Throw in chopped lettuce, shredded carrots, or thinly sliced celery for freshness and balance.
Assembly Tip
- Don’t Overfill the Wrap
Keep fillings in a tight row down the center to avoid tearing or spilling when rolling. - Crush Onions Just Before Using
For maximum crunch, crush your crispy onions just before assembling the wraps so they don’t go stale or soggy. - Layer Wisely
Place cheese between the warm chicken and the tortilla so it melts slightly when cooking. - Secure Wraps Before Cooking
Hold wraps closed with toothpicks while cooking, if needed. Just remember to remove them before serving.
Cooking Tips
- Use a Cast Iron or Nonstick Skillet
Cast iron gives the best crispy, golden-brown finish, but a nonstick skillet will work well too. - Weigh Down Wraps While Cooking
Use a spatula or small pan to press the wraps slightly during cooking. This improves browning and helps the seam stay sealed. - Cook Seam-Side Down First
Always start with the seam side down to seal the tortilla and keep everything inside. - Cook in Batches If Needed
Avoid overcrowding the pan. Cook two wraps at a time for even browning.
Serving & Storage Tips
- Serve Immediately for Best Crunch
These wraps are best eaten fresh off the skillet when the onions are crisp and the cheese is melty. - Reheat in the Air Fryer
If storing leftovers, reheat in an air fryer or toaster oven to maintain crispness. Avoid microwaving, as it makes the wrap soggy.