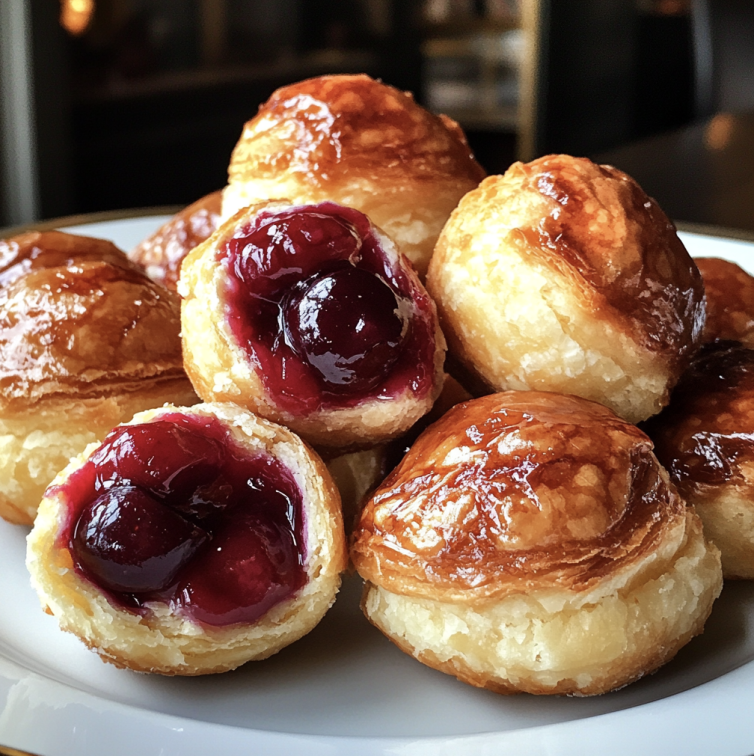
These Cherry Pie Bombs are the perfect blend of simplicity and indulgence — a bite-sized dessert that captures all the deliciousness of homemade cherry pie in a soft, golden, buttery shell. Each little pastry is stuffed with gooey cherry filling that melts in your mouth, surrounded by a warm, flaky crust that’s perfectly crisp on the outside and tender inside. Whether you’re baking for the holidays, hosting a party, or just craving something sweet, these cherry pie bombs are guaranteed to steal the show. The best part? You can make them in just minutes using simple ingredients you likely already have on hand. With their nostalgic pie flavor and elegant presentation, they look impressive but require almost no effort — a true win for busy bakers. Serve them warm dusted with powdered sugar or drizzle them with glaze for an extra touch of sweetness. They’re perfect for dessert tables, potlucks, or cozy nights when you want something quick, homemade, and utterly irresistible.
Why You’ll Love These Cherry Pie Bombs
You’ll love this recipe because it delivers all the comfort and flavor of a traditional cherry pie without the hassle of rolling out dough or making pie crust from scratch. Every bite combines the buttery crunch of golden pastry with the tangy sweetness of juicy cherries. These bombs are small, shareable, and fun to eat, making them ideal for parties and family gatherings. They bake up beautifully in the oven or air fryer, so you can choose whichever method suits you best. Beyond their amazing taste, Cherry Pie Bombs are incredibly versatile — you can easily customize them with different fillings, glazes, or even chocolate drizzles to match any occasion. They’re the kind of dessert that makes everyone think you spent hours in the kitchen when it actually took less than 30 minutes.
Why You Should Try This Recipe
If you’re someone who loves easy desserts that still feel special, this recipe is for you. It’s quick enough for a weeknight treat but impressive enough for holidays like Christmas, Thanksgiving, or Valentine’s Day. You can prepare them ahead of time, freeze them for later, or bake them fresh right before serving. The flaky exterior pairs perfectly with the warm, syrupy cherry filling — especially when served with a scoop of vanilla ice cream or whipped cream. Moreover, this recipe is foolproof; even beginner bakers can achieve perfect results every time. Once you try these cherry-filled delights, they’ll become your go-to dessert for any occasion.
Ingredients You’ll Need
1 can refrigerated biscuit dough or crescent roll dough, 1 cup cherry pie filling (homemade or store-bought), 2 tablespoons melted butter, ¼ cup granulated sugar, 1 teaspoon ground cinnamon (optional for flavor), and powdered sugar for dusting or glazing.
How to Make Cherry Pie Bombs (Step-by-Step)
Step 1 – Prepare the Dough: Start by preheating your oven to 375°F (190°C) or preheat your air fryer to 350°F (175°C). Open the can of biscuit or crescent dough and separate it into individual pieces. If using crescent dough, pinch the seams together to create solid squares. Lightly flatten each portion into a small disc about 3 inches wide. Keeping the dough slightly chilled will make it easier to work with and less sticky.
Step 2 – Add the Filling: Spoon a small amount — about one teaspoon — of cherry pie filling into the center of each dough disc. Be careful not to overfill them, as too much filling can cause leaks during baking. A little goes a long way since the filling spreads as it heats.
Step 3 – Seal the Bombs: Carefully fold the edges of the dough over the filling and pinch them tightly to seal. Roll each filled dough piece gently in your hands to form a smooth, round ball. Make sure there are no gaps or cracks, as this ensures the filling stays inside and the bombs puff up nicely while baking.
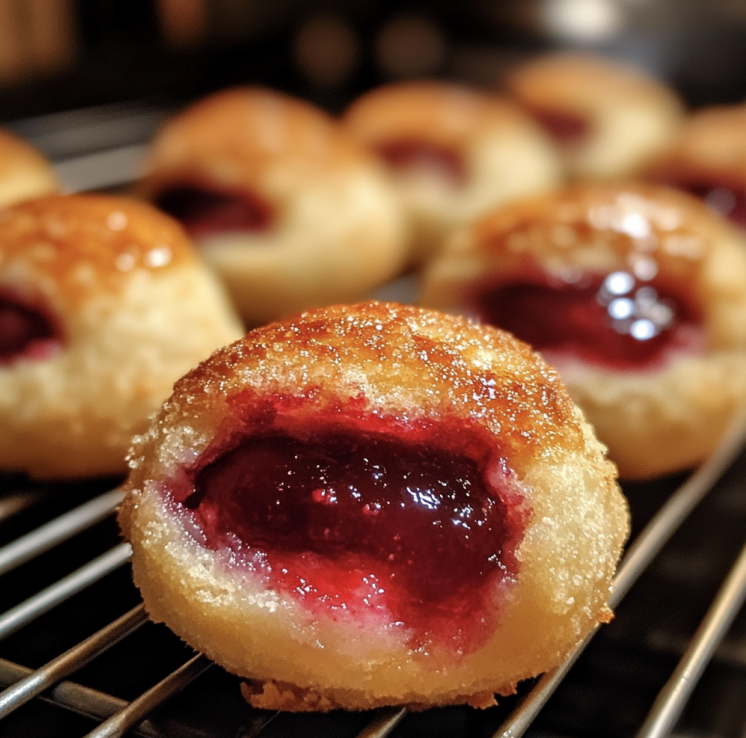
Step 4 – Coat with Butter and Sugar: Melt the butter in a small bowl. In another shallow bowl, combine the granulated sugar and cinnamon. Dip each dough ball in melted butter, then roll it through the sugar mixture until fully coated. This step gives your cherry bombs a golden crust with a caramelized edge that’s slightly crisp and sweet.
Step 5 – Bake or Air Fry: If baking, arrange the coated bombs on a parchment-lined baking sheet, spacing them about an inch apart. Bake for 12–15 minutes or until golden brown and puffed. For the air fryer, arrange them in the basket (without overcrowding) and cook for 8–10 minutes, shaking the basket halfway through. The result should be perfectly golden pastries with a slightly crisp exterior.
Step 6 – Cool and Finish: Let the Cherry Pie Bombs cool for a few minutes before handling — the filling will be very hot. Dust with powdered sugar for a classic touch, or drizzle with a simple glaze made from powdered sugar and milk for extra sweetness. Serve warm or at room temperature, and watch them disappear fast!
Tips for the Best Cherry Pie Bombs
- Don’t overfill the dough — too much filling causes leaks.
- Use cold dough for easier shaping.
- Seal the seams tightly with your fingers.
- Coat evenly in butter and sugar for consistent browning.
- Line the baking sheet for easier cleanup.
- If baking, rotate the pan halfway through for even color.
- Let them cool before adding glaze.
- Store extras in an airtight container to keep soft.
- Warm leftovers in the oven for a fresh-baked taste.
- Serve with ice cream or whipped cream for an elegant finish.
Variations & Substitutions
- Apple Pie Bombs: Replace the cherry filling with apple pie filling and add a sprinkle of cinnamon sugar.
- Blueberry Pie Bombs: Use blueberry filling and drizzle with lemon glaze for a bright, tangy twist.
- Chocolate Cherry Bombs: Add a few chocolate chips to the cherry filling before sealing.
- Strawberry Cheesecake Bombs: Combine strawberry filling with a spoonful of cream cheese inside.
- Nutella Bombs: Swap the fruit filling for Nutella or chocolate spread.
- Peach Pie Bombs: Use peach filling and top with caramel drizzle.
- Glazed Bombs: After baking, dip the tops in vanilla or almond glaze for a glossy finish.
- Puff Pastry Version: Use puff pastry instead of biscuit dough for a flakier crust.
- Holiday Version: Sprinkle with festive red and white sugar before baking.
- Mini Bombs: Make smaller versions for bite-sized party desserts.
What to Serve With Cherry Pie Bombs
Serve warm with a scoop of vanilla ice cream or a dollop of whipped cream for a classic dessert pairing. For a breakfast twist, enjoy them with a cup of coffee or hot cocoa. They also make a delightful addition to holiday dessert tables or brunch spreads. If you want to get creative, drizzle with chocolate or caramel sauce and serve on a platter garnished with fresh cherries or mint leaves.
Storage & Reheating Tips
To Store: Keep the cooled bombs in an airtight container at room temperature for up to 2 days, or refrigerate them for up to 5 days to extend freshness.
To Freeze: Place the cooled bombs on a baking tray and freeze until solid, then transfer to a freezer-safe bag. They can be frozen for up to 2 months.
To Reheat: For the best texture, warm them in an air fryer at 325°F (160°C) for 3–4 minutes or in a preheated oven at 300°F (150°C) for about 5 minutes. If using a microwave, heat for 15–20 seconds, but note they may lose some crispness.
Recipe FAQs
1. Can I make these ahead of time? Yes, assemble the bombs and refrigerate them unbaked for up to 24 hours before baking.
2. Can I use homemade pie filling? Absolutely, homemade filling gives a richer, fresher taste.
3. Can I air fry instead of baking? Yes, and they come out even crispier in less time.
4. Can I use puff pastry? Definitely, puff pastry creates a more delicate, flaky texture.
5. Can I add glaze? Yes, a simple glaze made with powdered sugar and milk takes them to the next level.
6. How do I prevent leaking? Make sure the seams are sealed tightly and don’t overfill.
7. Can I make them with other fillings? Yes, use any pie filling you like — apple, blueberry, or peach all work beautifully.
8. How do I store leftovers? Keep in an airtight container and reheat before serving.
9. Can I freeze them? Yes, they freeze perfectly and can be reheated straight from the freezer.
10. Can I serve them cold? They taste best warm, but are still delicious at room temperature.