
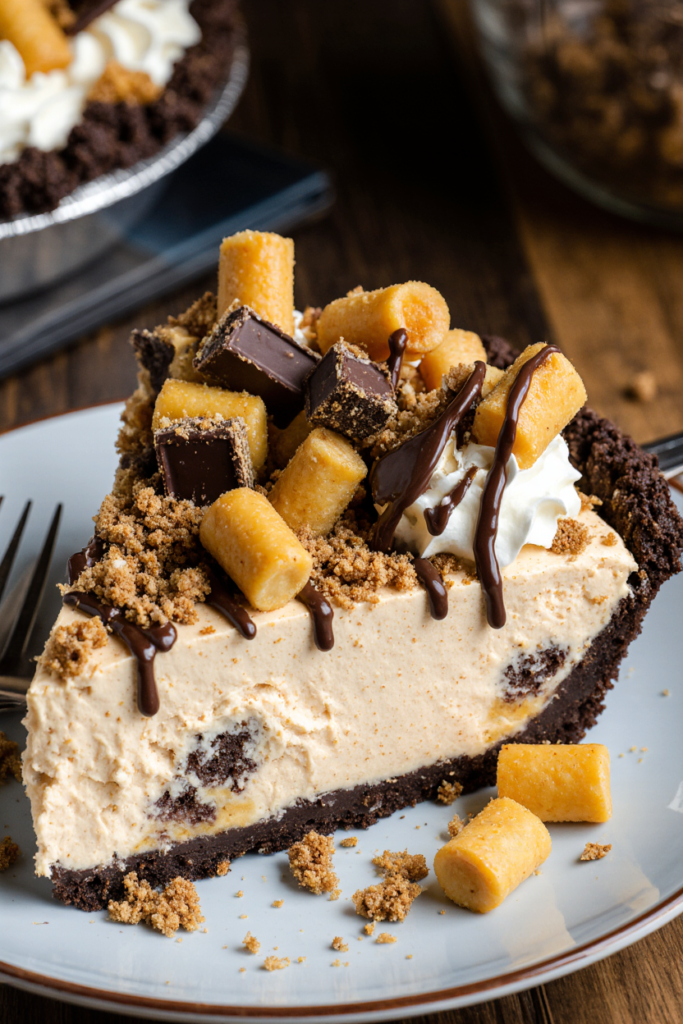
This Butterfinger Pie is a creamy, peanut-buttery dream come true for candy bar lovers. With a smooth, no-bake filling made of cream cheese, peanut butter, and Cool Whip folded together with chunks of Butterfinger candy, this pie tastes like a sweet cloud of chocolate and caramel crunch. It’s rich, indulgent, and surprisingly easy to make — no oven required!
Whether you’re making it for a summer barbecue, a birthday celebration, or a last-minute dessert, this Butterfinger Pie always impresses. The combination of sweet, salty, and crunchy flavors makes every bite irresistible. Best of all, it can be made ahead of time, making it the perfect make-ahead dessert for busy days or festive gatherings.
Why You’ll Love This Butterfinger Pie
You’ll love this recipe because it’s no-bake, crowd-pleasing, and full of nostalgic flavor. The blend of peanut butter and Butterfinger candy gives it that perfect mix of creamy and crunchy. It’s rich enough to feel indulgent but still light thanks to the Cool Whip base.
Additionally, it’s one of those recipes that looks like you spent hours making it — yet takes just minutes to prepare. With minimal ingredients and no baking required, you’ll have a pie that’s both elegant and effortless.
Why You Should Try This Recipe
If you love Butterfinger candy bars, this pie turns that classic flavor into a silky, dreamy dessert. The graham cracker crust adds just the right amount of crunch, while the peanut butter cheesecake-like filling delivers that creamy perfection.
Furthermore, this recipe is incredibly forgiving. You can use a store-bought crust or make your own from scratch, and it works just as well. The filling sets beautifully in the fridge, making it ideal for preparing in advance — especially for holidays or dinner parties.
Ingredients You’ll Need
For the Crust
- 1 premade graham cracker crust (or homemade if preferred)
For the Filling
- 1 (8 oz) block cream cheese, softened
- ½ cup creamy peanut butter
- 2 teaspoons pure vanilla extract
- 1½ cups powdered sugar
- 12 oz chopped Butterfinger candy bars
- 1 (8 oz) container Cool Whip, thawed
Optional Toppings
- Extra chopped Butterfinger pieces
- Chocolate syrup drizzle
- Whipped cream
How to Make Butterfinger Pie (Step-by-Step)
1. Prepare the Crust
If using a premade graham cracker crust, remove the lid and set it aside. If you’d rather make your own, combine 1½ cups of crushed graham crackers, ⅓ cup melted butter, and ¼ cup sugar. Press the mixture into a 9-inch pie pan and chill while preparing the filling.
2. Beat the Cream Cheese and Peanut Butter
In a large mixing bowl, beat the softened cream cheese and peanut butter together with a hand or stand mixer until completely smooth. This ensures your filling is creamy and lump-free.
3. Add Vanilla and Sugar
Next, add the vanilla extract and powdered sugar. Beat again until fully combined. The mixture should be thick and slightly fluffy.
4. Fold in Cool Whip and Butterfinger Pieces
Using a spatula, gently fold in the Cool Whip and about ¾ of the chopped Butterfingers. Mix just until evenly incorporated — you want to keep some air in the mixture for that light, mousse-like texture.
5. Assemble the Pie
Spoon the creamy filling into your prepared crust, spreading it evenly with a spatula. Sprinkle the remaining Butterfinger pieces over the top. For extra indulgence, drizzle chocolate syrup across the surface in a zigzag pattern.
6. Chill to Set
Cover the pie loosely with plastic wrap or foil and refrigerate for at least 3–4 hours (or overnight) to allow it to set. The filling will firm up while staying creamy and luscious.
7. Slice and Serve
Before serving, garnish with a few extra Butterfinger crumbles or a dollop of whipped cream. Slice gently with a sharp knife for clean edges and serve cold.
10 Tips for the Best Butterfinger Pie
- Use full-fat cream cheese for the creamiest texture.
- Beat the cream cheese first before adding peanut butter to prevent lumps.
- Don’t overmix the Cool Whip — folding keeps it light and airy.
- Chill the pie overnight for the best flavor and texture.
- Use frozen Butterfingers when chopping to avoid sticking.
- Add a pinch of salt to balance the sweetness.
- Make it in advance — it stores perfectly for up to three days.
- Use a deep-dish crust for a taller, creamier pie.
- Add melted chocolate drizzle for a bakery-style finish.
- Serve chilled, not frozen, for the smoothest bite.
10 Variations & Substitutions
- Oreo Crust: Use crushed Oreos instead of graham crackers.
- Reese’s Version: Replace Butterfingers with chopped Reese’s cups.
- Nutella Twist: Add 2 tablespoons of Nutella to the filling.
- Chocolate Cool Whip: Use chocolate-flavored Cool Whip for extra richness.
- Whipped Cream Substitute: Replace Cool Whip with homemade whipped cream.
- Crunchy Peanut Butter: Swap creamy for crunchy for extra texture.
- Mini Pies: Make mini versions in muffin tins for individual desserts.
- Frozen Pie: Freeze for a few hours for an ice-cream-like treat.
- Caramel Drizzle: Add caramel sauce for a sweet-salty twist.
- Low-Sugar Option: Use sugar-free Cool Whip and light cream cheese.
What to Serve With Butterfinger Pie (Step-by-Step)
- Pair each slice with a cup of hot coffee or espresso to cut through the sweetness.
- Serve with a scoop of vanilla or chocolate ice cream for an indulgent touch.
- Add fresh whipped cream and a few Butterfinger crumbs for presentation.
- Offer a glass of cold milk for kids or classic comfort.
- Garnish with chocolate curls or caramel drizzle for a bakery-style finish.
Storage & Reheating Tips (Step-by-Step)
To Store
Cover the pie with its plastic lid or wrap it tightly with foil. Refrigerate for up to 4 days.
To Freeze
Freeze the whole pie or individual slices for up to 2 months. When ready to serve, thaw in the refrigerator overnight.
To Serve from Frozen
If you prefer a firmer texture, serve slightly frozen — it tastes like an ice cream pie. Let it sit at room temperature for 10–15 minutes before slicing.
Recipe FAQs
- Can I make Butterfinger Pie ahead of time?
Yes! It’s one of the best make-ahead desserts. Simply prepare it the day before and refrigerate until ready to serve. - Can I use whipped cream instead of Cool Whip?
Yes. Use 3 cups of homemade whipped cream for a fresher flavor and a softer texture. - Can I make this pie without peanut butter?
You can, but the flavor will change. Substitute with cream cheese and a few tablespoons of caramel sauce for a similar richness. - Can I use frozen whipped topping?
Yes, but make sure to thaw it in the fridge before folding it in to maintain the creamy texture. - Can I make it gluten-free?
Yes! Use a gluten-free graham cracker crust or crushed gluten-free cookies. - How long does it take to set?
At least 3–4 hours in the refrigerator, but overnight yields the best results. - Can I use light cream cheese or sugar-free Cool Whip?
Definitely. It will slightly change the texture, but it still tastes amazing. - Can I use a chocolate crust instead?
Yes, a chocolate cookie crust complements the Butterfinger flavor beautifully. - How do I prevent a soggy crust?
Keep the pie chilled and avoid letting it sit out too long before serving. - Can I freeze leftovers?
Absolutely. Wrap slices individually for easy grab-and-go desserts.