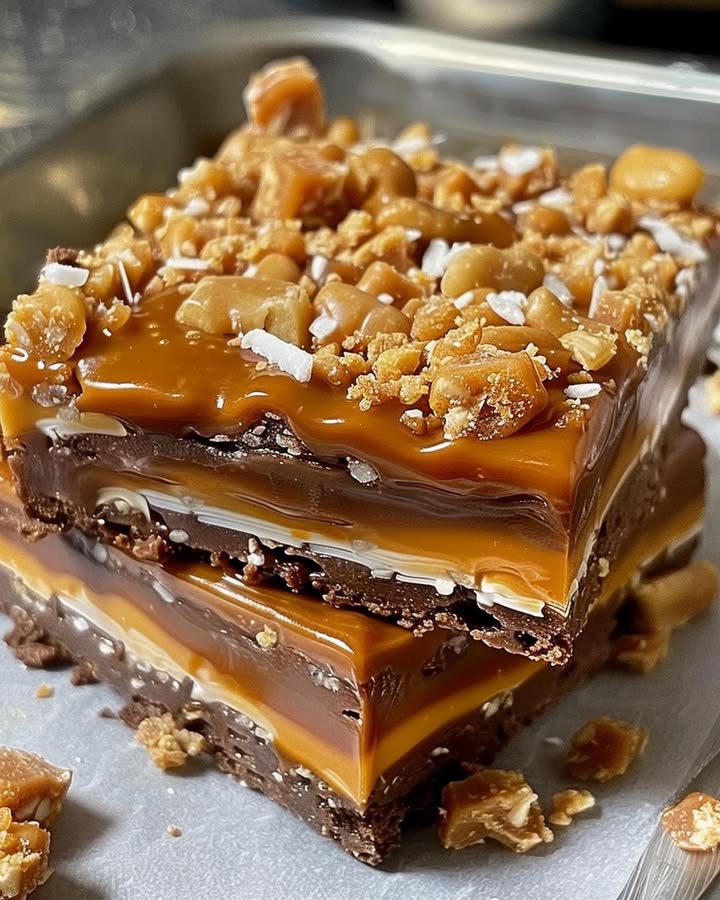
Butterfinger Caramel Crunch Bars are the ultimate indulgent treat — a rich, layered dessert that combines gooey caramel, crispy Butterfinger bits, and creamy chocolate in every bite. Imagine the best parts of a candy bar — that irresistible crunch, sweet buttery caramel, and smooth chocolate — all baked (or chilled) together into easy-to-slice bars that taste like pure decadence.
These bars are a perfect marriage of textures and flavors: buttery cookie crust, chewy caramel center, and a crunchy, chocolatey topping. They’re sweet enough to satisfy any craving but balanced with that signature Butterfinger crunch that keeps you coming back for “just one more piece.”
Perfect for holidays, bake sales, or when you simply need a crowd-pleasing dessert, these bars are simple to make yet taste like something straight from a bakery. They store beautifully and are an excellent choice for parties, potlucks, or homemade gifts.
Why You’ll Love This Butterfinger Caramel Crunch Bars
- Combines the nostalgic flavor of Butterfinger candy bars with gooey caramel and chocolate.
- Easy to prepare with simple pantry ingredients.
- Chewy, crunchy, and creamy textures all in one dessert.
- Great for make-ahead treats — they store and travel well.
- Perfect for candy lovers and guaranteed to impress a crowd.
Ingredients You’ll Need
For the Crust Layer:
- 1 cup (2 sticks / 225 g) unsalted butter, melted
- 2 cups (240 g) graham cracker crumbs (or digestive biscuit crumbs)
- 1/2 cup (100 g) brown sugar, packed
For the Caramel Layer:
- 1 (14 oz) can sweetened condensed milk
- 1/2 cup (100 g) brown sugar
- 1/2 cup (115 g) unsalted butter
- 1/4 cup (60 ml) light corn syrup or honey
- 1 teaspoon vanilla extract
For the Topping:
- 1 1/2 cups (270 g) semi-sweet or milk chocolate chips
- 1 tablespoon vegetable oil or coconut oil (for smooth melting)
- 1 1/2 cups (about 6 regular-sized bars) crushed Butterfinger candy bars
How to Make Butterfinger Caramel Crunch Bars
Step 1: Prepare the crust
Preheat your oven to 350°F (175°C). Line a 9×13-inch baking pan with parchment paper, leaving an overhang on the sides for easy removal.
In a medium bowl, combine melted butter, graham cracker crumbs, and brown sugar. Mix until the texture resembles wet sand. Press evenly into the bottom of the pan using the back of a spoon or the bottom of a glass.
Bake for 10 minutes, then remove from the oven and let cool slightly while preparing the caramel layer.
Step 2: Make the caramel layer
In a heavy-bottomed saucepan, combine sweetened condensed milk, brown sugar, butter, and corn syrup. Cook over medium heat, stirring constantly, until the mixture starts to bubble and thicken (about 8–10 minutes).
Continue stirring until it turns a deep golden color and reaches a thick, pourable consistency (around 225°F / 107°C if using a candy thermometer). Remove from heat and stir in vanilla extract.
Step 3: Assemble the bars
Pour the hot caramel evenly over the baked crust, using a spatula to spread it to the edges. Allow to cool for about 10 minutes before adding the topping.
Step 4: Make the chocolate topping
In a microwave-safe bowl, melt chocolate chips with vegetable oil in 30-second intervals, stirring between each, until smooth and shiny.
Pour melted chocolate over the caramel layer, spreading it evenly with a spatula. Immediately sprinkle crushed Butterfinger pieces on top, pressing them lightly into the chocolate to help them stick.
Step 5: Chill and set
Refrigerate for at least 2 hours, or until the layers are fully set and firm. Once chilled, use the parchment paper overhang to lift the slab out of the pan. Cut into bars or squares using a sharp knife.
Tips for the Best Results
- Use quality chocolate chips. Semi-sweet gives balance to the sweet caramel; milk chocolate will make the bars extra rich.
- Stir caramel constantly to prevent scorching — it thickens quickly.
- Crush Butterfingers just before using for maximum crunch. Too fine a crush makes the topping dusty rather than crispy.
- For clean cuts, warm the knife under hot water, wipe dry, and slice.
- Chill fully before slicing — this ensures neat, defined layers.
- For a shortcut: Use store-bought caramel sauce (thick kind) if you’re short on time.
Variations & Substitutions
- Peanut Butter Twist: Stir 1/4 cup creamy peanut butter into the melted chocolate for a Reese’s-style version.
- Nutty Crunch Bars: Add 1/2 cup chopped peanuts or almonds on top of the caramel before adding chocolate.
- Dark Chocolate Lovers: Use 70% cocoa chocolate for a richer, less sweet treat.
- Salted Caramel Version: Sprinkle sea salt flakes on the caramel before adding chocolate for a sweet-salty balance.
- Gluten-Free Option: Substitute gluten-free graham crackers for the crust.
- Blondie Base: Instead of a crumb crust, bake a blondie layer and top with caramel, chocolate, and Butterfingers.
What to Serve With Butterfinger Caramel Crunch Bars
Butterfinger Caramel Crunch Bars are rich and satisfying, so they pair best with something light and refreshing — such as:
- A glass of cold milk or iced coffee
- Vanilla bean ice cream or frozen yogurt
- Fresh berries to balance the sweetness
- A mug of hot cocoa or cappuccino for cozy dessert pairings
Storage & Freezing Tips
- Room temperature: Store in an airtight container for up to 3 days.
- Refrigerator: Keeps fresh for up to 7 days; serve slightly chilled for a firm bite.
- Freezer: Freeze for up to 2 months. Separate layers with parchment paper to prevent sticking. Thaw in the refrigerator overnight before serving.
- To package as gifts: Cut into squares, wrap each piece in wax paper, and store in a decorative tin or box.
Recipe FAQs
Can I use store-bought caramel instead of homemade?
Yes, but make sure it’s thick (like caramel dip, not sauce). Heat slightly before spreading to make it easier to layer.
Can I use other candy bars instead of Butterfingers?
Definitely. Try crushed Heath bars, Snickers, or Reese’s Cups for a different flavor twist.
Can I make these no-bake?
Yes. Skip baking the crust — just press it firmly and chill for an hour before adding caramel and chocolate.
How do I prevent my caramel from burning?
Keep the heat medium-low and stir constantly. Caramel burns quickly once it thickens. Using a heavy-bottomed pan helps distribute heat evenly.
How long should I let the bars set?
At least 2 hours in the fridge, or overnight for the cleanest slices.
Can I make these ahead of time?
Yes, they’re perfect for make-ahead desserts. Prepare up to 3 days in advance and store tightly covered in the refrigerator.
How do I get the perfect crunch texture?
Use freshly crushed Butterfingers and press them gently into the melted chocolate so they adhere but don’t lose their crispness.